Microsoft’s Windows 11 operating system comes with several built-in features to ensure users have a good user experience while using their computer. It also has a built-in tool called Narrator which, as its name indicates, is a screen reading tool for every single element on the screen.
The company designed this feature or tool for people with visual impairments using the Narrator feature to allow Windows 11 to read emails, web pages, documents, and more.
In this step-by-step guide, we’ll show you how to quickly and easily enable the Narrator feature on your computer running the new Windows 11 operating system.
How to enable Narrator feature in Windows 11
Step 1: Open the Settings application on your Windows 11 computer. For this, right-click the Start icon and select the app from the context menu. Alternatively, you can press the Windows + I keys on your keyboard to open the Settings application.
Step 2: When the app opens, click the “Accessibility” tab from the left sidebar, then click the “Narrator” option from the right pane.

Step 3: Next, turn on the switch next to the “Narrator” option. You can also configure to start the function when the system boots and log into your account.
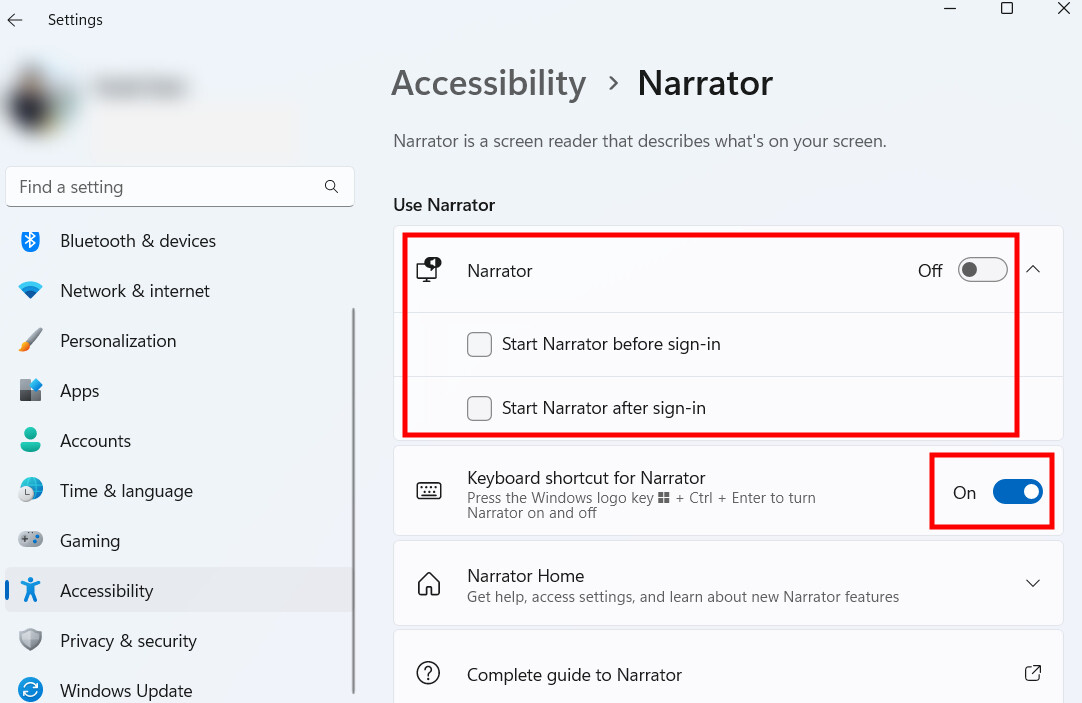
That’s all. After following the above-mentioned steps, the Narrator feature is enabled on your Windows 11 computer. You can launch the Narrator app using the Windows keyboard shortcut + CTRL + Enter key. Once opened, a dialog box for multiple items will appear on the screen, but you will have an option to skip any selection or stop displaying that box on the screen.
When Narrator Home opens, you can learn more about its functions and commands. Uncheck the “Show Narrator home when Narrator starts” box if you don’t want Narrator to appear every time you use Narrator.