Locked folders are a great way to protect your data from prying eyes. This is especially useful if you want to share your computer with others, such as family members or colleagues, and want to keep some files private.
However, for some reason, this feature is not available in Windows by default. To get this functionality, you need to create an executable .bat file using Notepad and Command Prompt, making the whole process cumbersome and useless for any beginner.

To help our readers, we have created this in-depth guide that explains how to easily password lock any file or folder in Windows 11 using this free and easy to use third party app.
Step 1: Go to your favorite web browser and search for Xoslab’s Easy File Locker and download it.
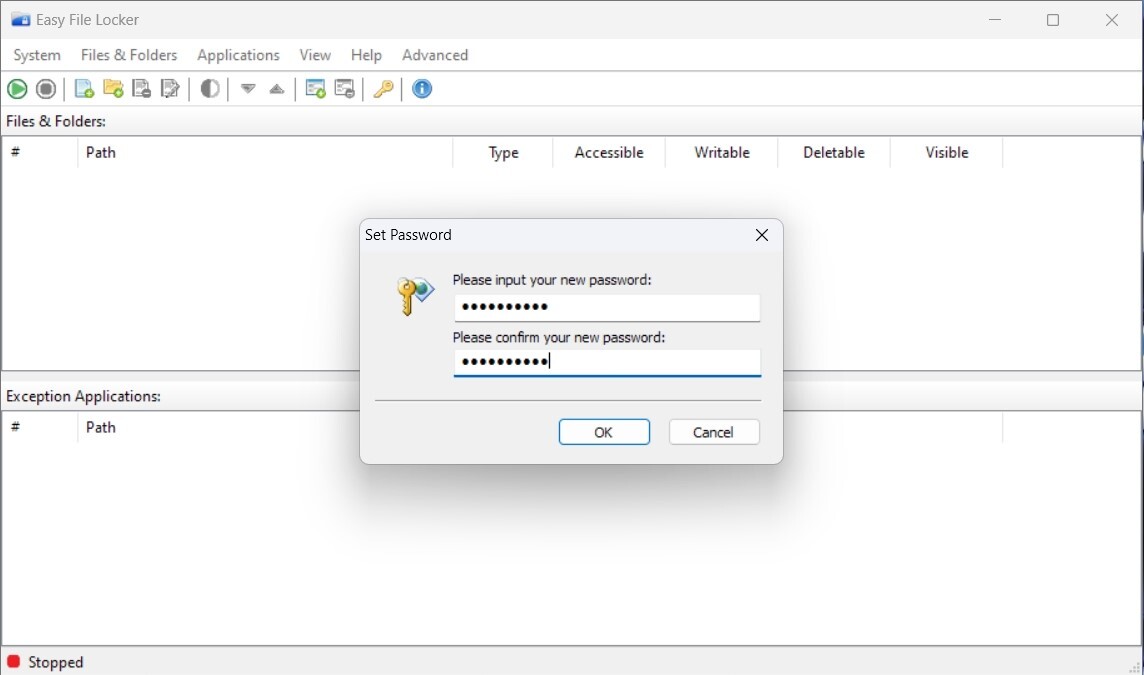
Step 2: Launch the newly installed Easy File Locker app and click System> Set Password.

Step 3: It will now ask you to set a new password. Once entered, you need to confirm the password and click OK to set it.
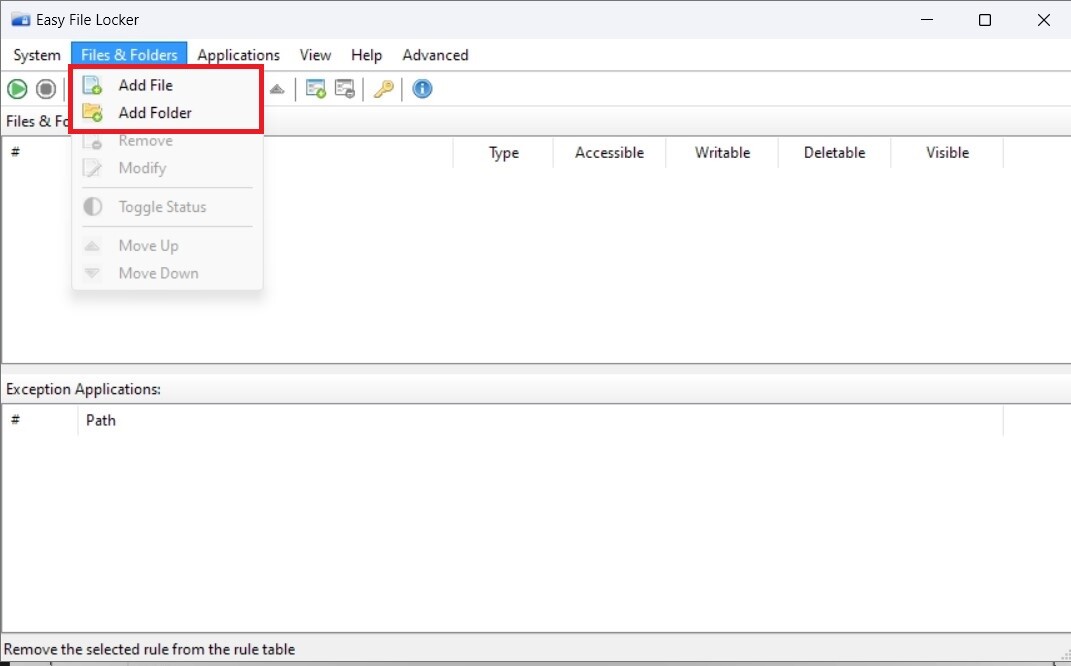
Step 4: Click Files and foldersthen click Add folder (or Add files if you want to lock a file).
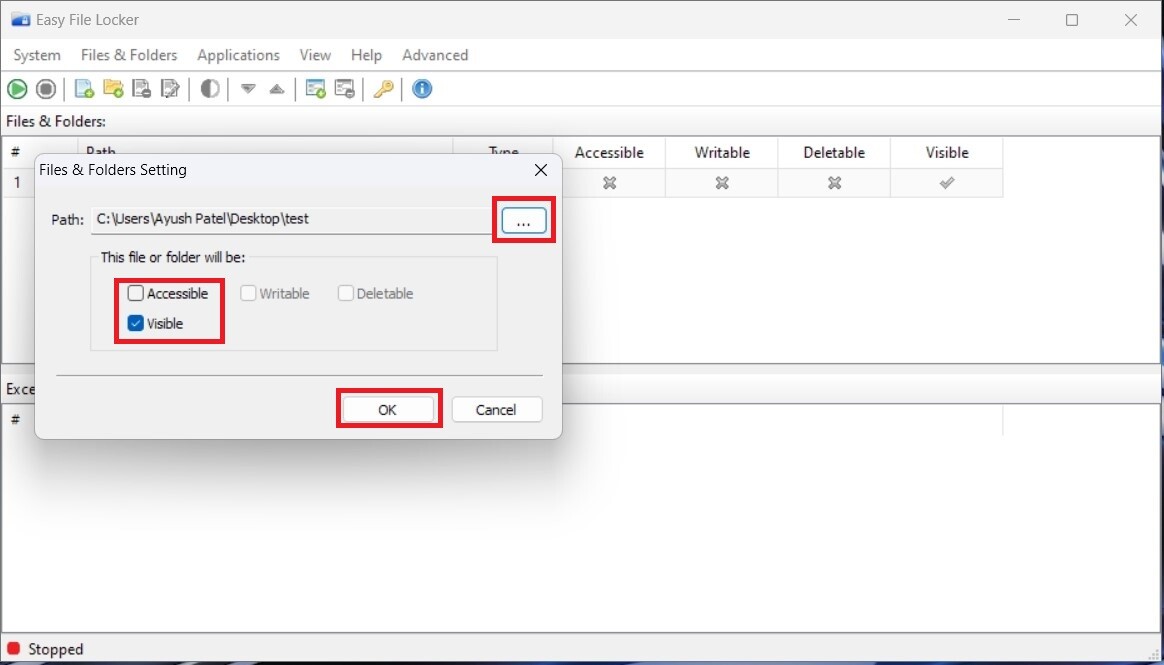
Step 5: Uncheck Accessible and enable Visible. Now, click on the three dots, go to the folder you want to lock with a password and click OK.
After locking the folder, you will see that every time you try to open the locked folder, you will be asked to enter the password. Alternatively, if you want to permanently unlock a folder, you can easily do so by going to Files and folders> Remove.