MAC (media access control) addresses correspond to a unique and often immutable device identifier assigned by device manufacturers to different network adapters such as Wi-Fi radios and Ethernet controllers or any other machine that can be connected to the Internet.
In addition to helping devices communicate with each other, you can also use MAC addresses to see which devices are connected to your Wi-Fi network by looking for their MAC address and looking for them online.

In this guide, we’ll go over all the ways you can find your Windows 11 PC’s MAC address.
Method 1: using the Settings app
The first and easiest way to find your Windows 11 PC’s MAC address would be via Settings, as shown below:
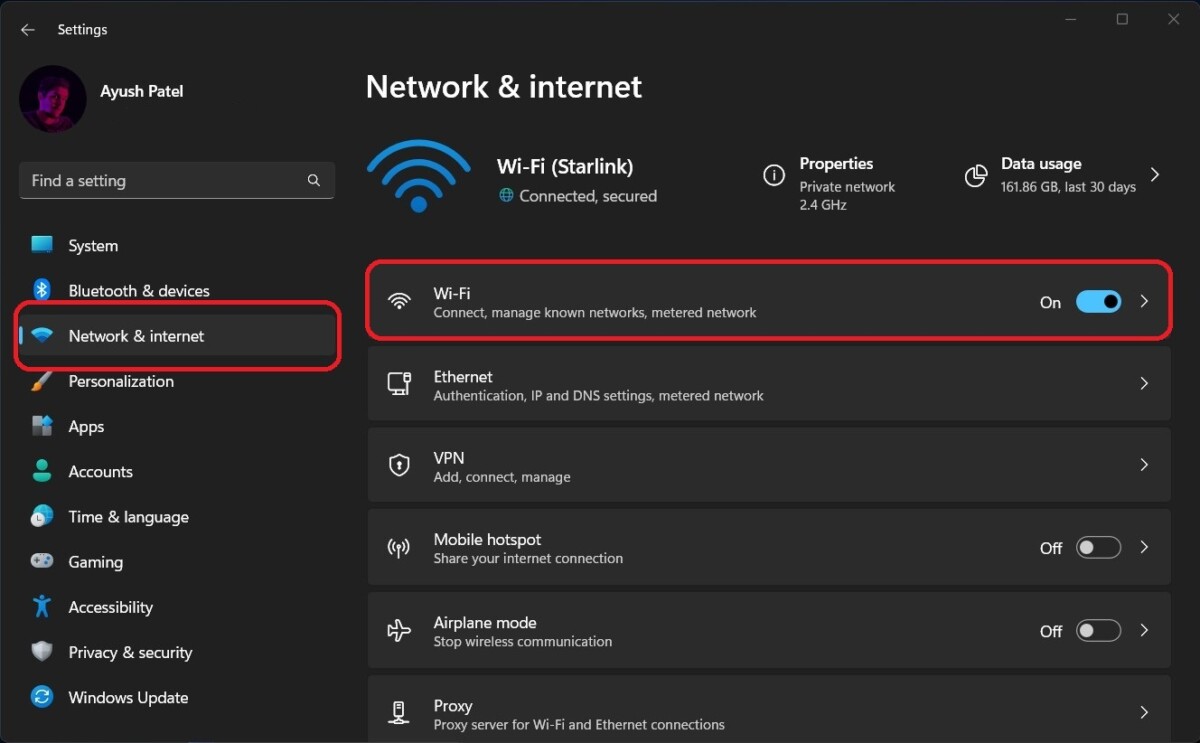
- Go to Start and click on the Settings icon located at the bottom right.
- Within the settings, go to Network and Internet, then click on Wi-FI.
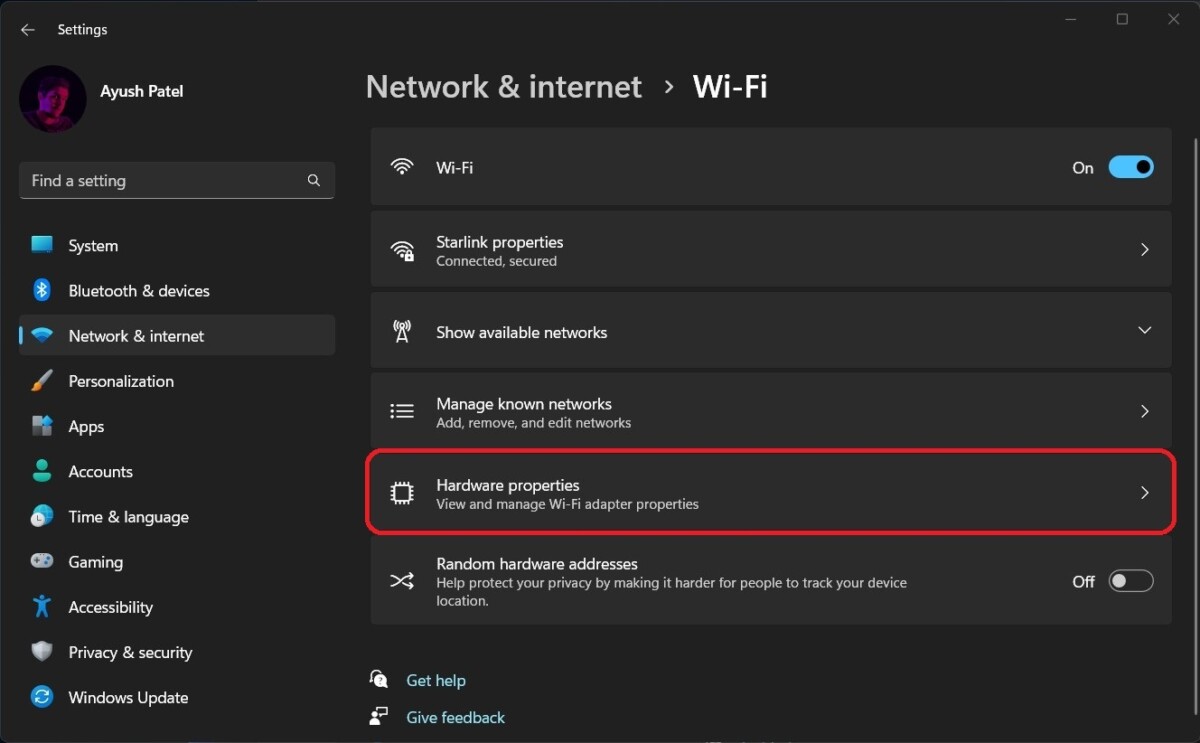
- In WI-Fi, locate and click on the option that says Hardware Properties.
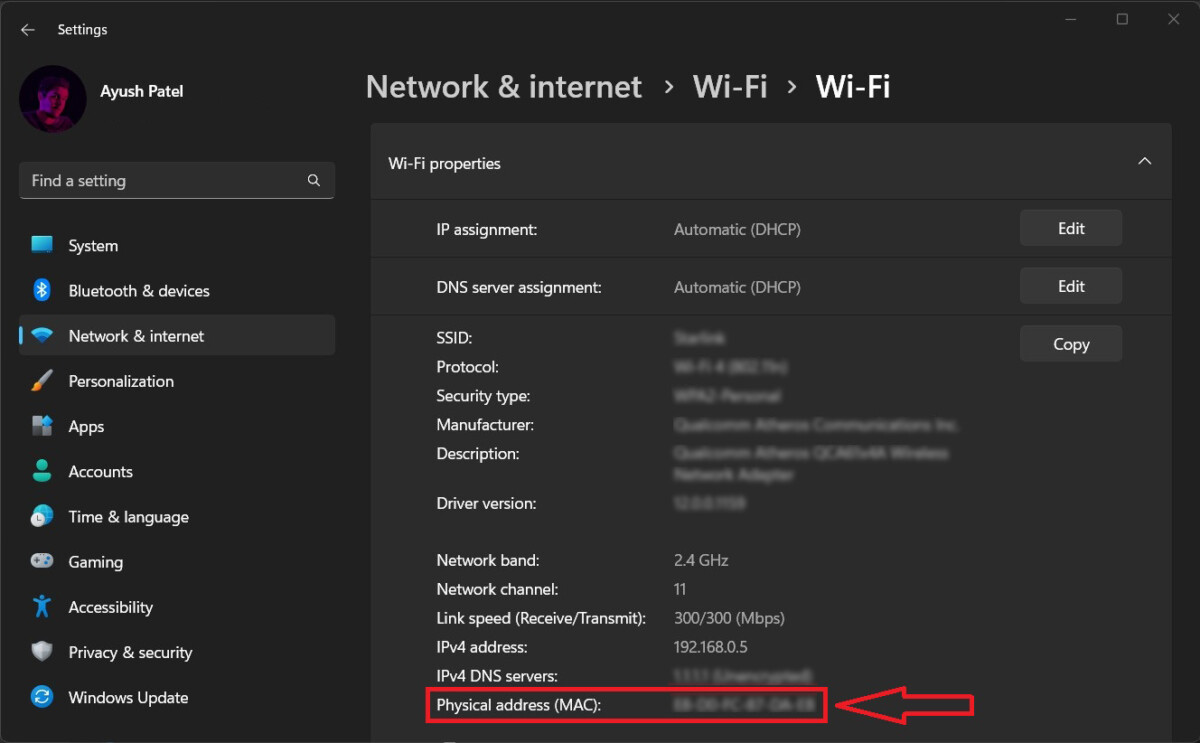
- You will now see the MAC address of your PC in the format XY: XY: XY: XY: XY: XY in addition to the label that says Physical Address (MAC). Alternatively, you can click ethernet instead of Wi-Fi in the first step to view its MAC address.
Method 2: using Windows PowerShell
The second method, although a bit complex, uses PowerShell to search for your devices, or we can tell the MAC address of your network card as described below:
- Right-click the Start button and then select Terminal. (You can also use the Wind + X shortcut to access this menu). A Windows Powershell window opens.
- After opening PowerShell, type the following command:
getmac /v
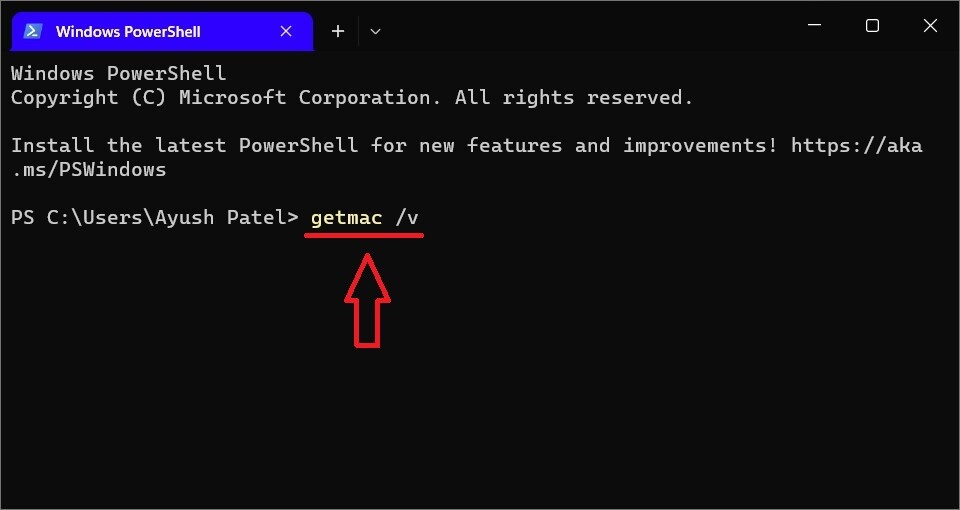
- After entering the command, press Enter on your keyboard to execute it.
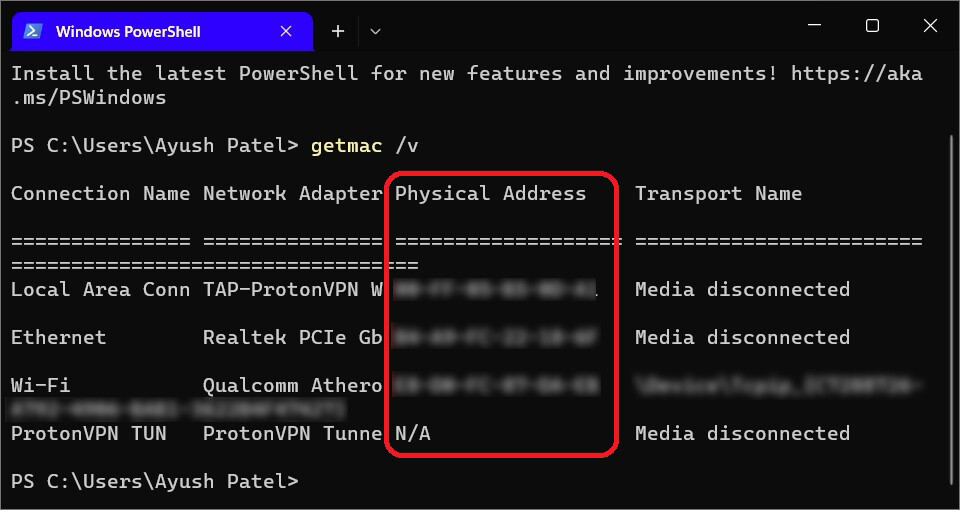
- You should now see a list of all available wireless adapters and their MAC addresses as well as the label that says Physical Address.
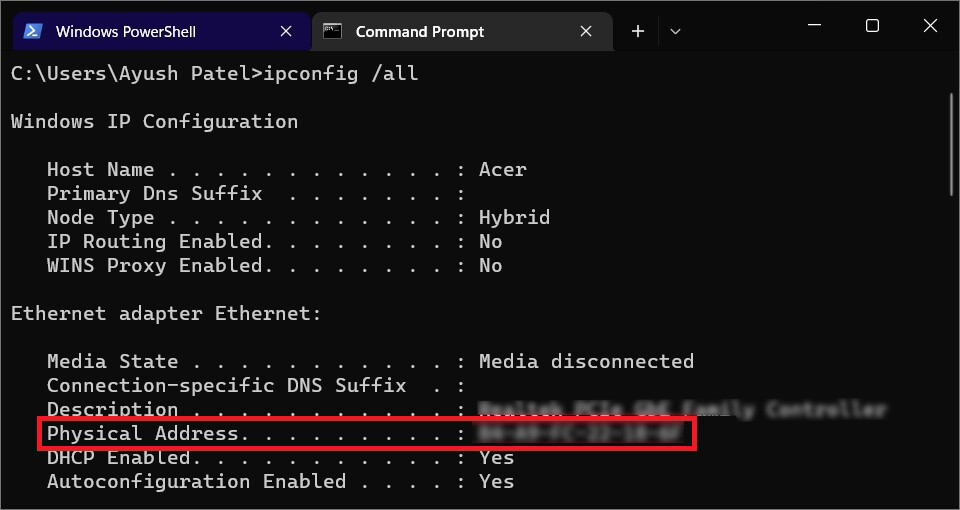
Method 3: using the command prompt
- Right-click the Start button and then select Terminal. (You can also use the Wind + X shortcut to access this menu). A Windows Powershell window opens.
- Inside the Powershell window, click the little down pointer next to the plus button and select Command Prompt to open it in the new tab.
- Once you’ve done that and opened the command prompt, type the following command:
Ipconfig /all
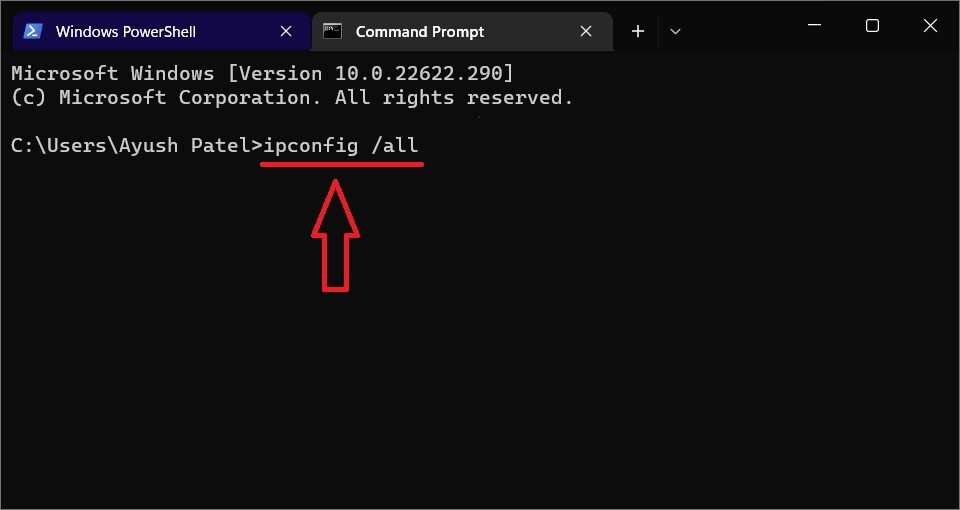
- After entering the command, press Enter on your keyboard to execute it.
- You should now see a list of all available wireless adapters and their MAC addresses as well as the label that says Physical Address.