First introduced in Windows 10, virtual desktops allowed users to create separate desktops with their applications for multitasking and to instantly switch between workflows.
However, thanks to Windows 11, you now have the additional ability to create virtual desktops with their own separate wallpapers. Here’s everything you should know about it, from creating a virtual desktop to using it effectively.
Step 1: accessing virtual desktops
You can access virtual desktops quite easily on any Windows 11 PC by hovering over the Task View button located next to Start and Search on the taskbar.

However, if in case you don’t see the Task View button, here’s how you can enable it:
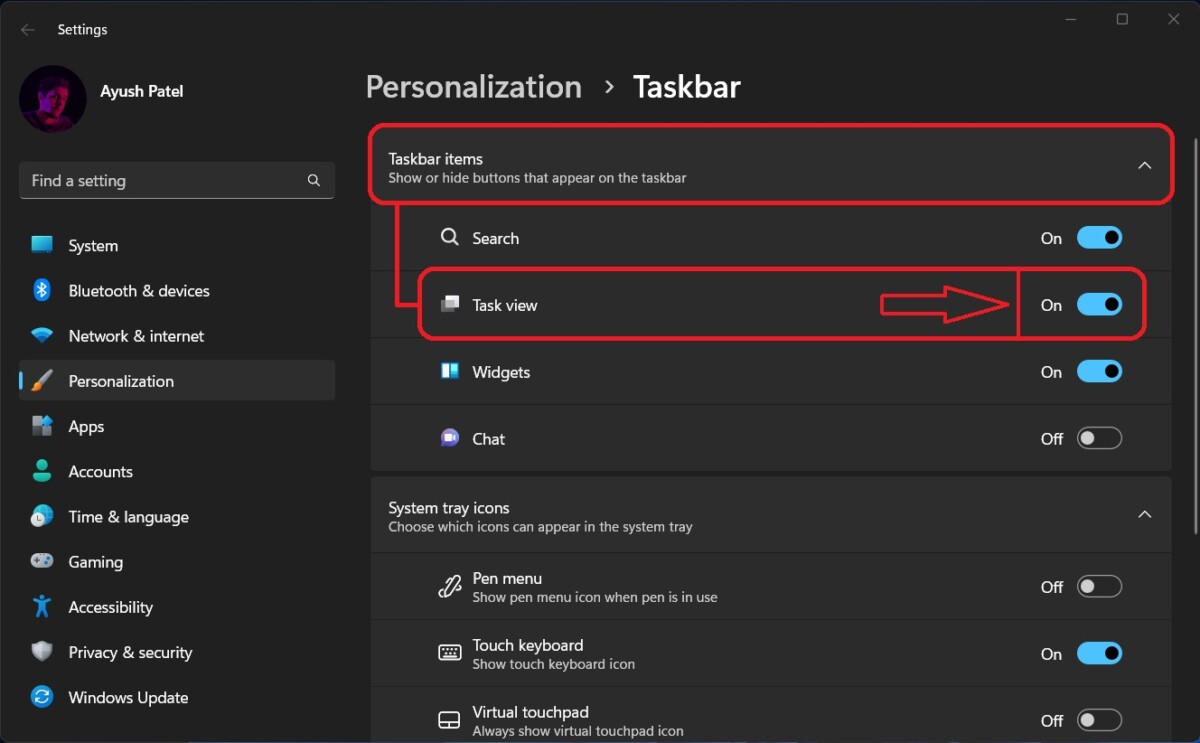
- Right-click the taskbar, then select Taskbar Settings. A Settings window opens.
- In the Settings window, look for the Task View switch that should be listed under Taskbar Items and turn it on.
Step 2: Using Virtual Desktops
Now that you know how to access virtual desktops on your PC, let’s see how you can use it to effectively multitask and increase your productivity:
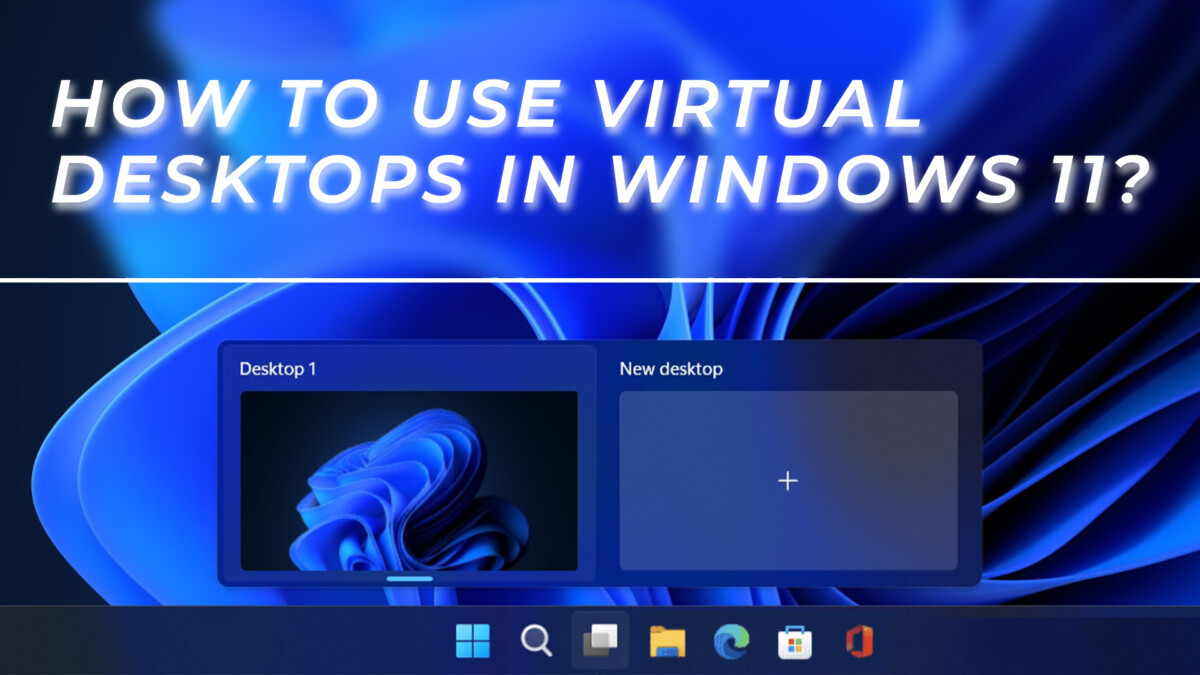
- Hover over the Task View button and click the plus button to create a new desktop that will be labeled Desktop 2, Desktop 3, 4, 5, and so on. (Alternatively, you can use the Win + Ctrl + D shortcut to create new virtual desktops).

- Once created, click on the new desktop to open it. You can also right-click on any virtual desktop to rename it or set a different wallpaper.

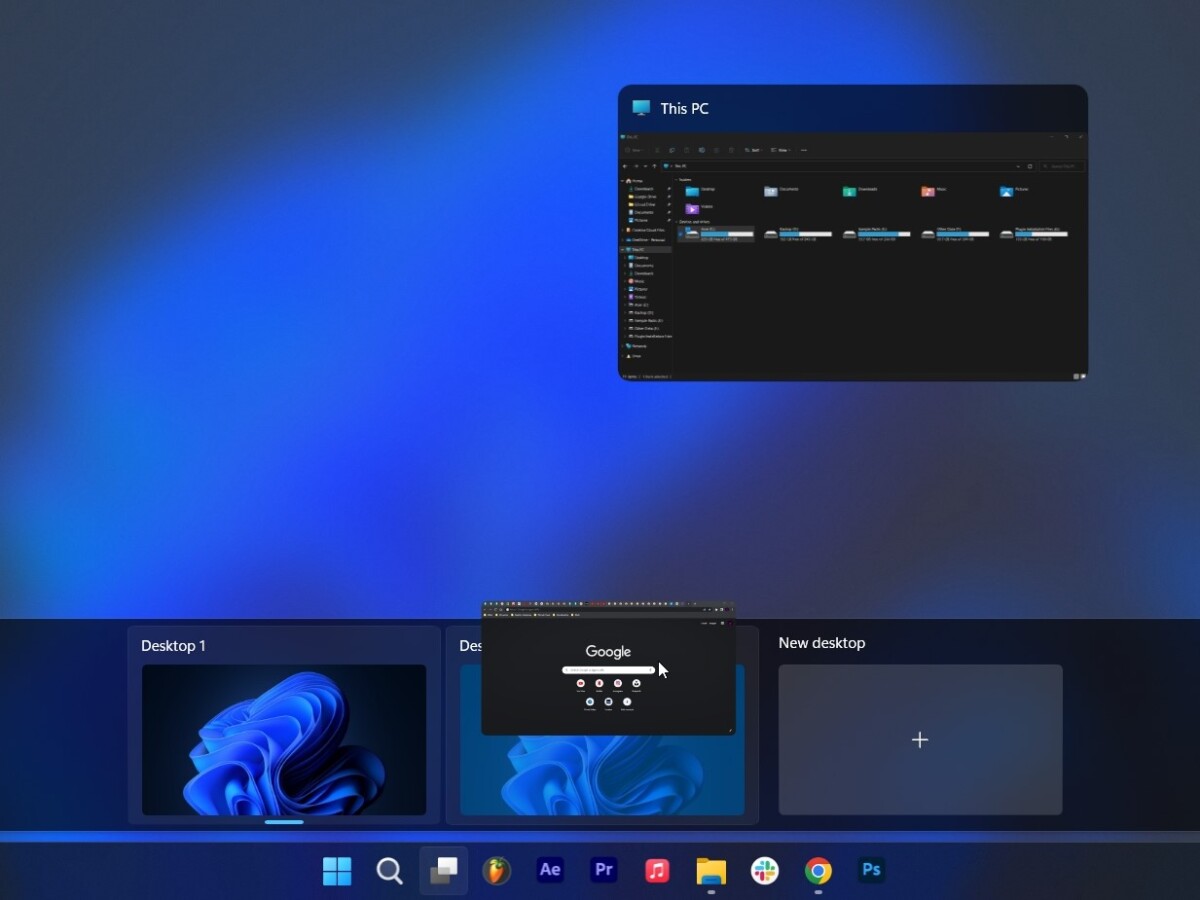
- Then open the apps related to your new workflow or click the Task View button to drag and drop the existing apps onto your new virtual desktop.
That’s pretty much all there is to know about using virtual desktops to effectively multitask on Windows 11.